Skip to content

How To?

Securely Transfer Files in cyberelements

In this article we will explain how to transfer files in cyberelements. This article describes the various methods possible whithin the platform.

All operations are performed directly on the user portal or the administration console.

The configurations are done in the Applications menu.

cyberelements console

Configuring Secure File Transfer

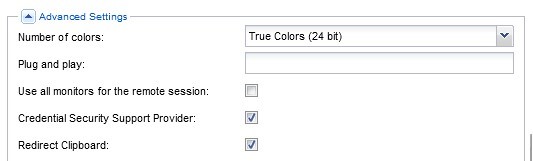
Classic RDP file transfer

This method involves redirecting the clipboard in the Advanced Settings of an RDP application.

Once connected, the clipboard functions as it would in a standard RDP session, allowing files to be copied between the client and the server.

HTML5 RDP file transfer

It is also possible to perform file transfer in an HTML5 session. You’ll need to check the Enable file transfer option in the Advanced Settings of your HTML5 RDP application.

The process allows users to drag and drop files into the RDP window for transfer to the remote server.

For standard applications:

For privileged applications:

Once connected to your HTML5 application, you can send a file to the remote server by dragging and dropping it directly into the rdp window.

The file will then be located on the G network drive

G Network install

To retrieve files from the server, drag items into the ‘Download’ folder on the G network drive. Files will then be downloaded via the browser.

Launch application

SSH file transfer via Filezilla

This method requires the creation of a privileged application and the activation of file transfer in the Advanced Settings. Filezilla will be used for SSH file transfer.

enable file transfer

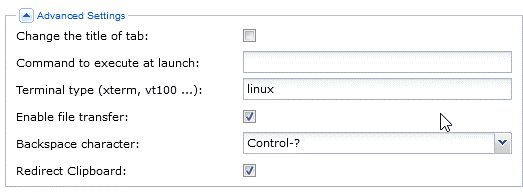
HTML5 SSH file transfer

File transfer is available for privileged HTML5 SSH applications when the Enable file transfer option is enabled.

HTML5 SSH

It works in the same way as HTML5 RDP, with a SFTPSHARE drive being installed during the connection.

This share directory can be accessed by typing “cd $SFTPSHARE”.


To transfer a file from the server to the local workstation, copy the file to the download folder in the $SFTPSHARE directory.

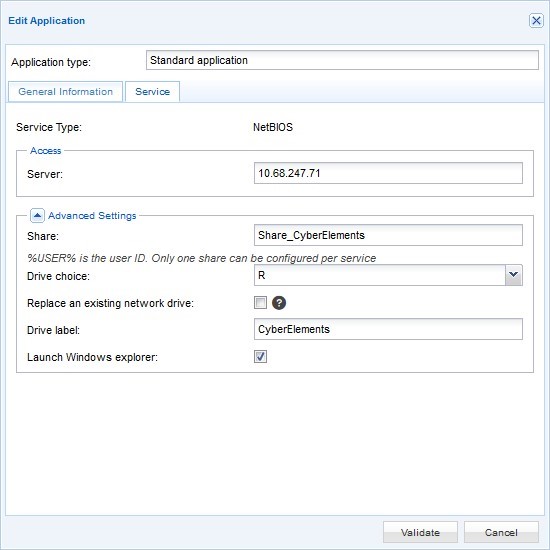
File transfer via NetBIOS resource

You can configure a standard SMB application to install a network drive on the PC.

In this example, the ‘Share_CyberElements’ share is installed on the 10.68.247.71 server, using the letter R and the name ‘CyberElements’ as the installation point.

This drive then appears on the client workstation.

Let’s see the result on a client workstation.

The drive is correctly installed on the R: drive and is named cyberelements

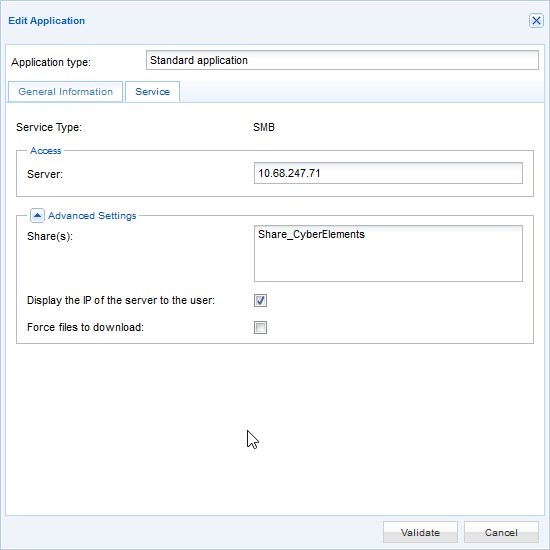
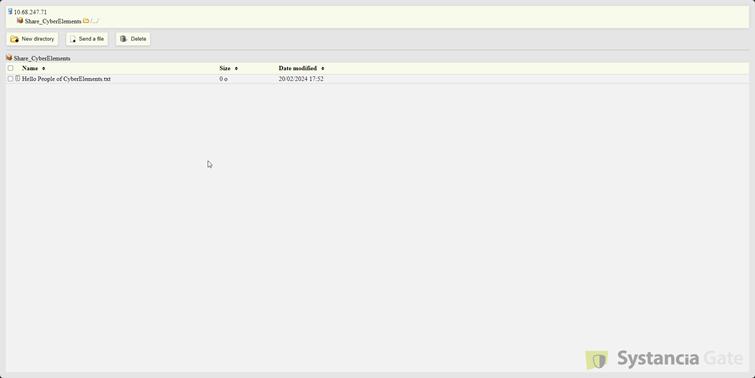
File transfer via SMB resource

cyberelements also supports SMB file transfer via the browser. In the following example, the ‘Share_CyberElements’ share on server 10.68.247.71 is mapped, and the result is visible on the user portal side after launching the resource.

Let’s see the result on the user side after launching the resource.