How To Increase The Size of The /var Partition on Virtual Appliances
This article describes how to extend an LVM partition on cyberelements’ virtual appliances (OVAs).
Extending an LVM Partition on cyberelements
Objective: Add 100 GB to the /var partition.
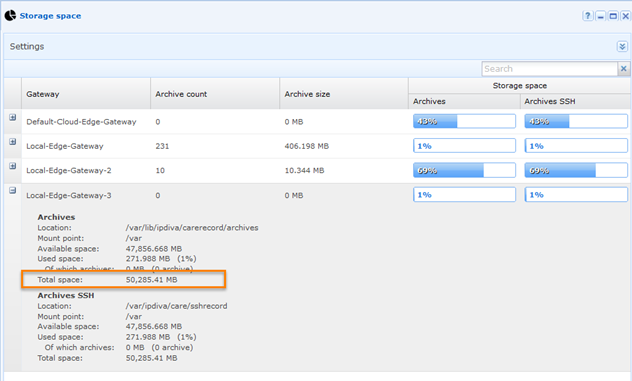
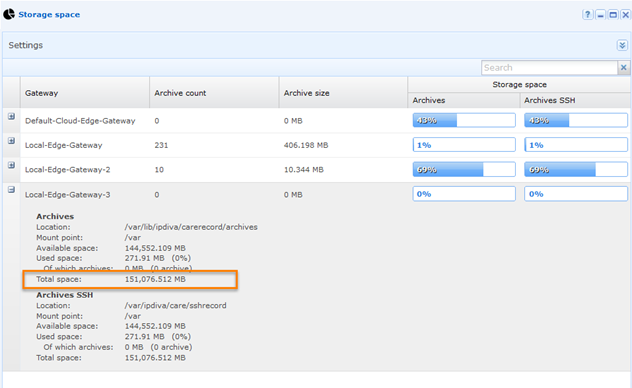
Current diskspace utilization and capacity can be viewed in the Storage space report in the management console.
Check if the partition is LVM & extend the disk
To check that the partition is LVM, run the command df -h /var from your gateway terminal:
The /dev/mapper/SystanciaLVMGroup-var part allows us to know that the /var partition is LVM.
From your hypervisor, extend the disk and take a snapshot of your VM (important!).
From your gateway terminal, reload the configuration to allow Linux to see the disk extension with the command echo 1> /sys/class/block/sda/device/rescan
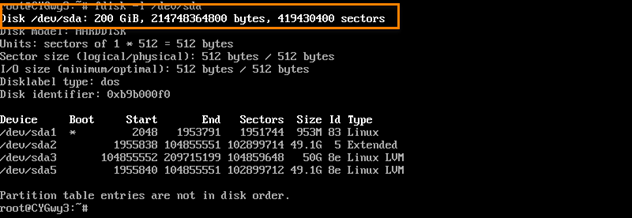
Check that the new size has been assigned to the disk with the command fdisk -l /dev/sda
Note: If the new size has not been allocated, it is recommended to restart the server.
Create a new partition
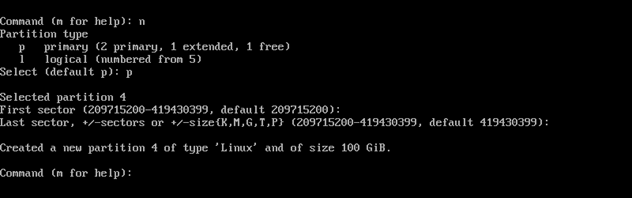
From your gateway terminal, run the fdisk -c /dev/sda command as root (su -)
Create a new partition with the option n, partition type p, partition number 4
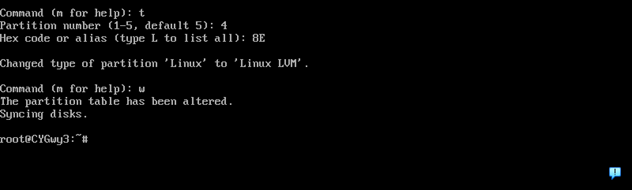
Change partition type with the option t, number 4, hex code 8E
Validate changes with w
Then reboot using the reboot command:
Initialize the Physical Volume (PV) with the command pvcreate /dev/sda4
Extend volume group
Display physical volume information pvs
Extend Volume Group with command vgextend SystanciaLVMGroup /dev/sda4
Check status with command pvscan
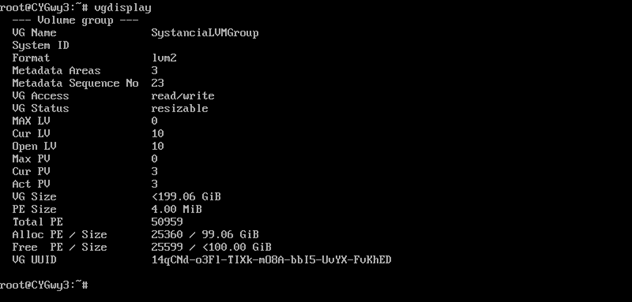
Display Volume Group properties using command vgdisplay
Note: Get the parameter (Free PE / Size 25599 / <100.00 GiB)
Extend lvm partition using command
lvextend -l +25599 /dev/SystanciaLVMGroup/var
Increase the file system with the command
resize2fs /dev/mapper/SystanciaLVMGroup-var
Check that your partition size has been increased with the command df -h /var
You can also view the updated status in the management console.
Note: Use the refresh button at the bottom of the storage space screen to get the latest information.