A workflow is a just in time (JIT) access request to specific resources. In addition to the access request feature, the administrator can define access conditions for a set of resources.
The administrator can have full control access to resources that are considered critical and for which an access notifcation is required. Therefore, access is only grantedafter human approval.
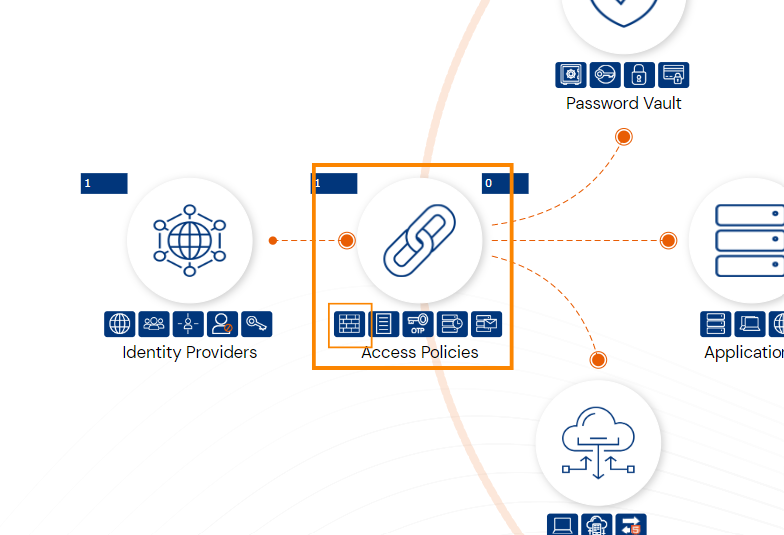
cyberelements offers many access restriction possibilities. In section we are going to learn how to use and implement the workflow mechanism in cyberelements.
How to set up access request workflow in cyberelements?
First, we need to choose the concerned users group, sites, and resources in the admin console.
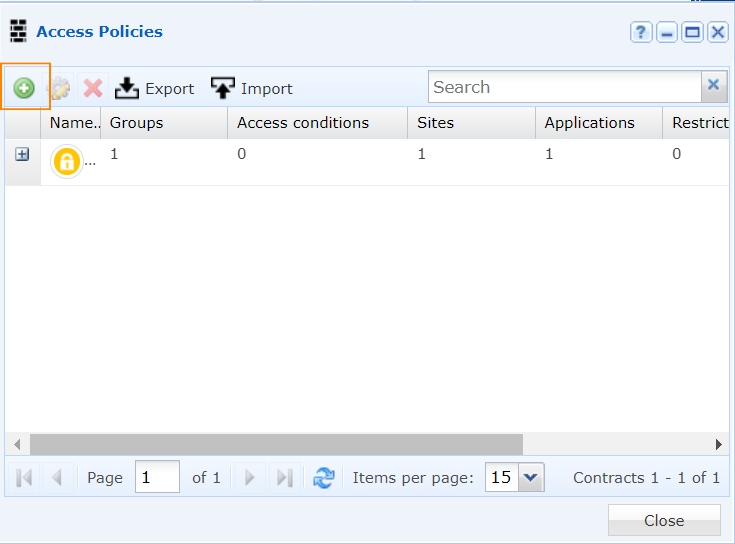
Once the resources that need to be restricted are identified, you need to create access contracts in the Access Policies section:
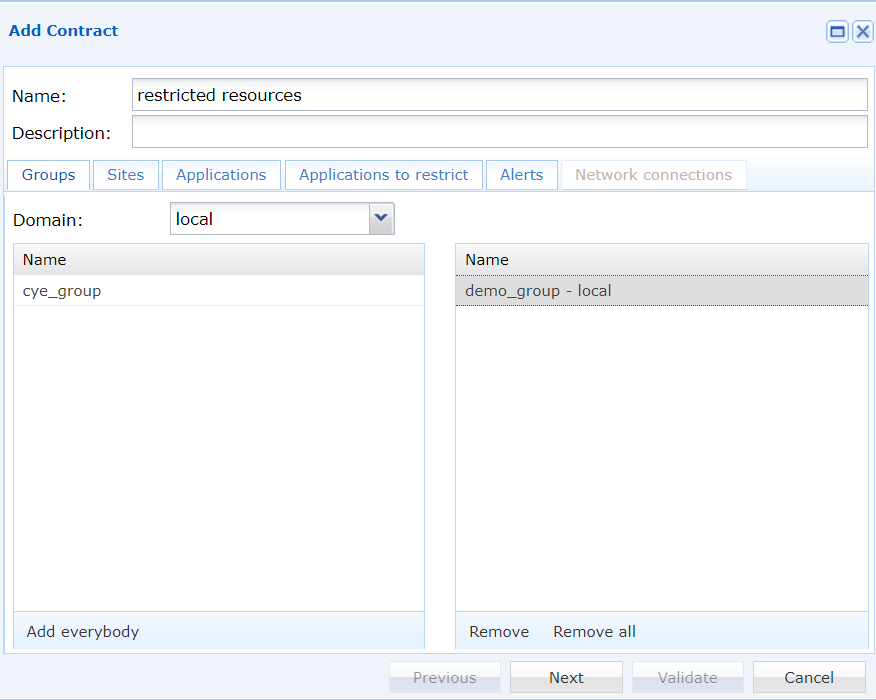
Step 1 - Choose the users group
First, you will need to choose the users group which will be able to see the selected resources on the cloud portal.
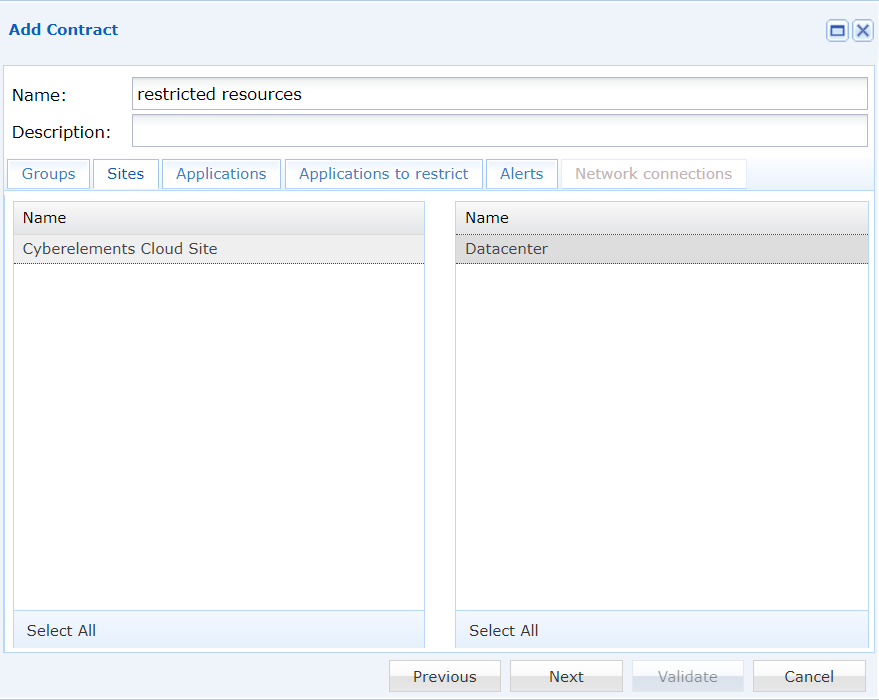
Step 2 - Select the appropriate site
Select the site that allows access to the resources.
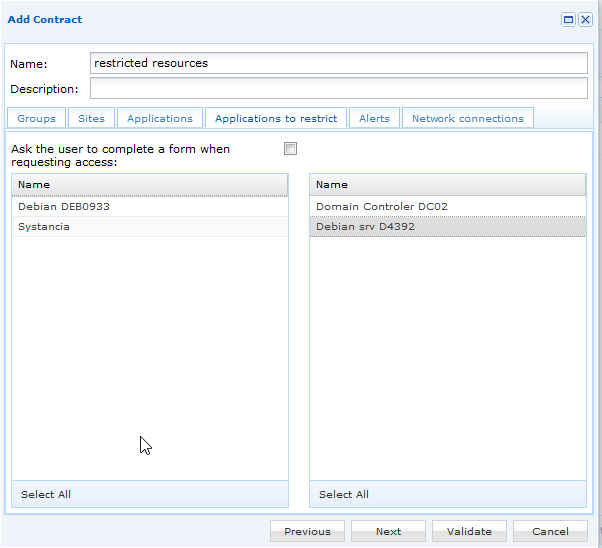
Step 3 - Select the portal resources
Select the resources that you would like to appear on the portal for the chosen group of users.
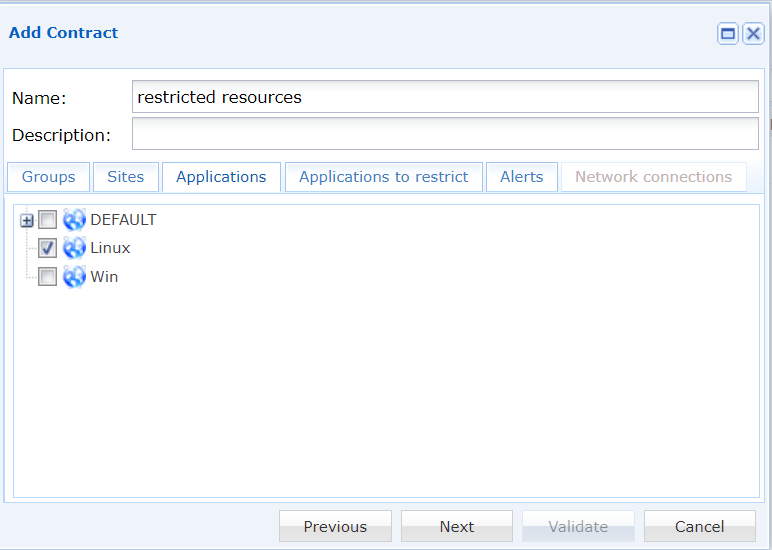
Step 4 - Add selected resources to the restriction list
Select the resources that will require the administrator’s permission to access and click the Validate button.
How does the access request workflow work?
Now you have the access request workflow up and running. Let’s check how does it work.
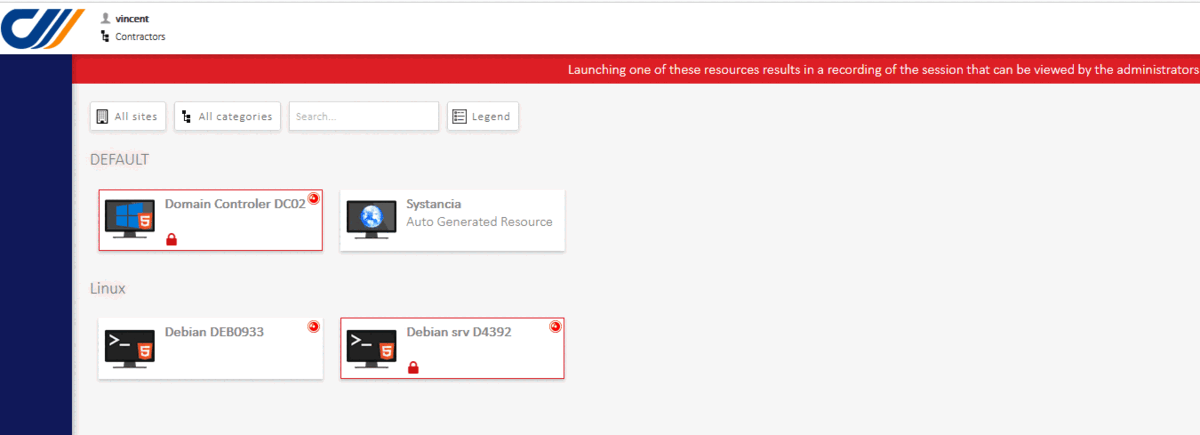
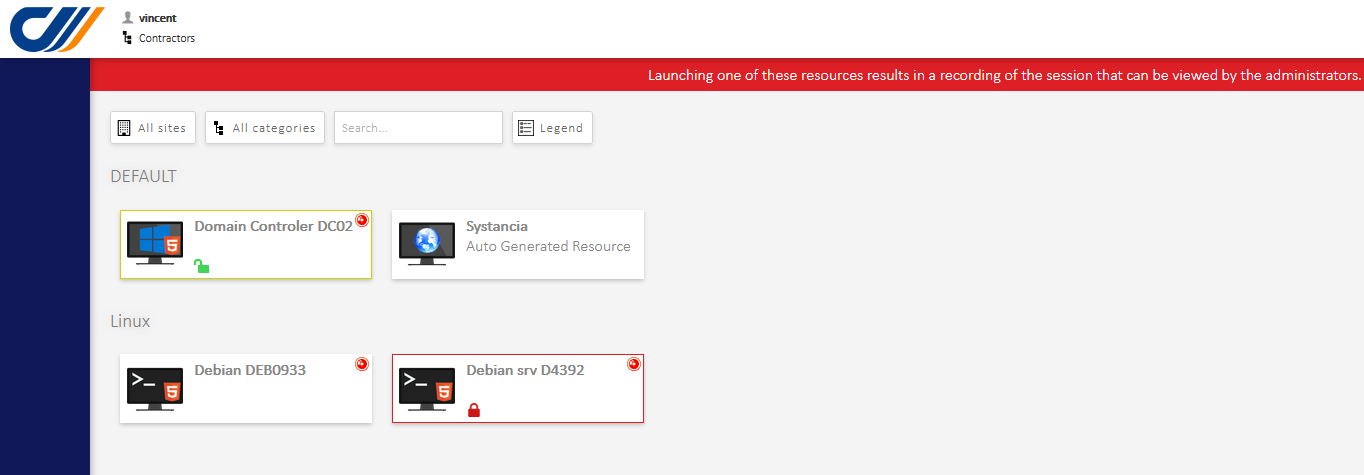
When users are logged in, they will now have the restricted resources (that require the administrator’s authorisation) in red.
When users click on restricted resources, the following message will appear.
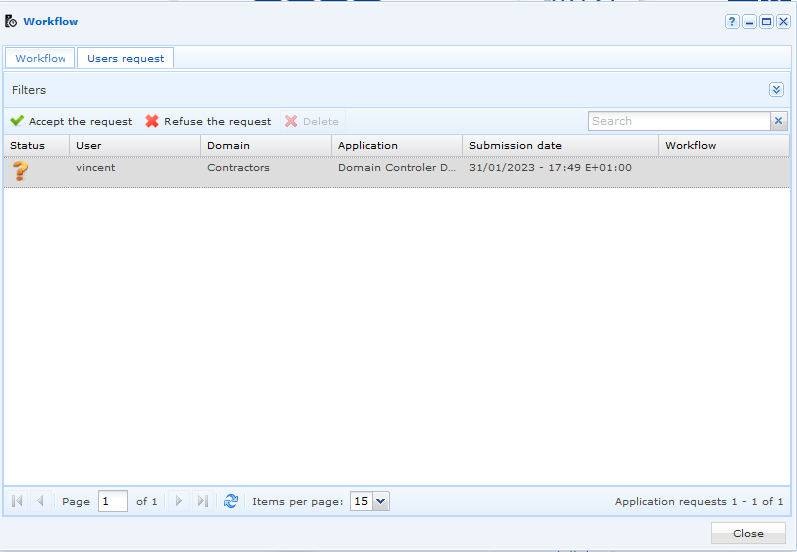
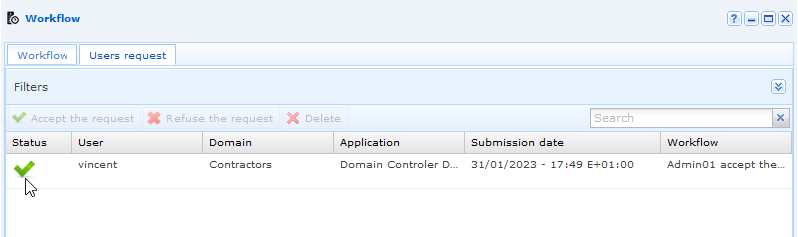
The user request in the admin console
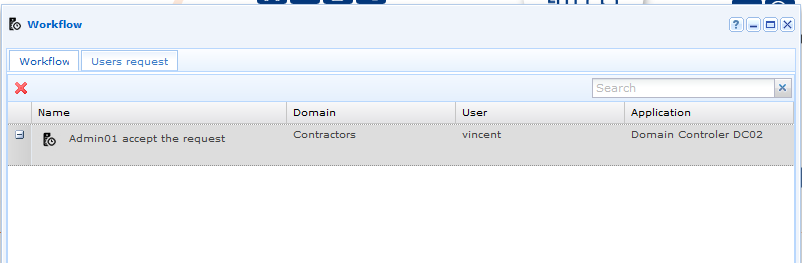
You can now find the request in the “Workflow” menu
by clicking on the “User Request” tab
It is possible to accept or reject an incoming request. It can also be deleted if necessary.
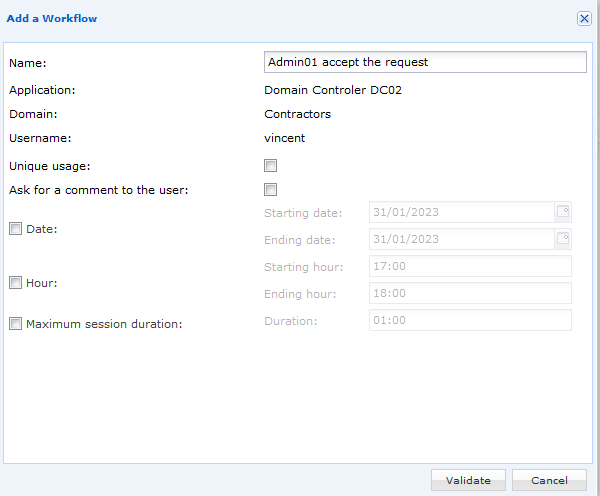
If the request is accepted, several options are available. click on the question mark icons in the following image to learn more about each option.
Unique Usage:
The user can only launch the resource once.
If the user wants to run it again,
a second access request need to be made.
Ask for a comment to the user:
When the resource is opened,
the user will be asked for a comment
(e.g. for the reason for connection).
This comment will be displayed in
the video archive afterwards.
Date:
It is the date when the user can open the resource.
After the deadline, the user will not longer be able to start the
resource and will have to make a new request.
Hour/Time:
It is the time slot where the user is allowed to open the resource.
If the user attempts to launch the resource outside these times,
the user will see a red lock on the resource.
Maximum session duration:
It is the maximum time during which a user can use the resource.
After this period, the user will be automatically logged out.
Once the user’s request is validated, a green check appears under Status.
To obtain more details about the validation request, you can simply go to the Workflow Tab.
To note: If a workflow is deleted, access rights are lost and a new request should be made.
Once a request is validated by the administrator, a green padlock will appear in the user account.
Additional Information:
By default, there are no email alerts configured to notify the administrator that the request has been made. However, you can set it up in the admin console. For that, you will need an SMTP server configured.
Once the SMTP server is configured, we need to define and set up a notification profile.
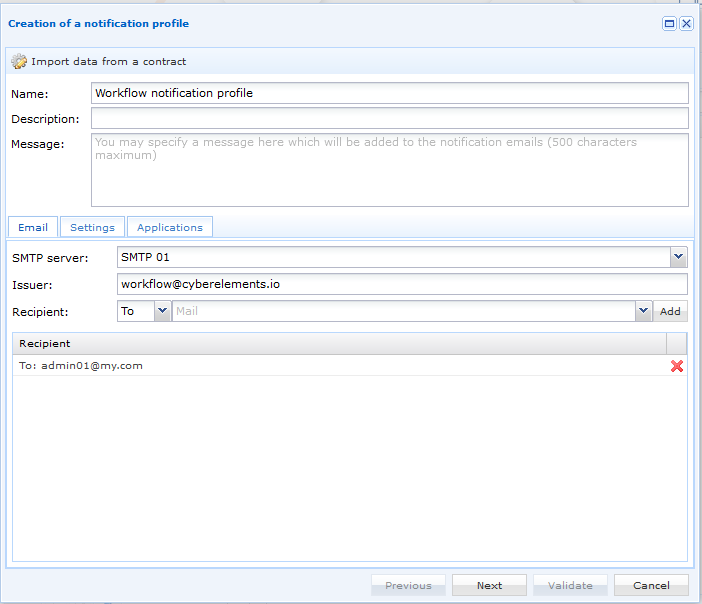
Step 1 - Fill in the email information
First, you will need to choose the users group which will be able to see the selected resources on the cloud portal.
Step 2 - Check the "Request access to resources" box
First, fill in the SMTP server, sender and recipient(s) of the mail:
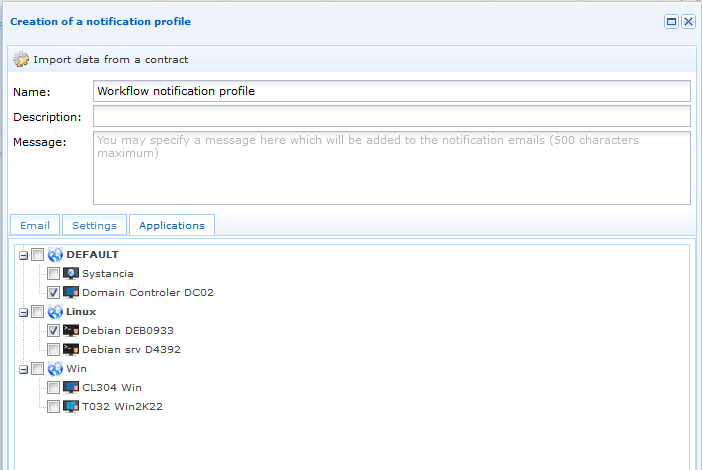
Step 3 - Select the resources
In the “Resources” tab, check the concerned resources, and click “validate“.
With the Resource Access Request feature, you can now have full control on critical resources. Our experts highly recommend using this feature to manage access and increase the security level.
How To? Securely Transfer Files in cyberelements In this article we will explain how to transfer files in cyberelements. This article describes the various methods
How To? Configure an SMTP Server The cyberelements platform allows to receive alerts, notifications and OTPs by e-mail via an SMTP server integrated into the
How To? Transfer the password vault’s database to another server? This article explains how to move the database of the embedded vault containing the various
How To? Implement authentication with FIDO2 keys This article describes how to implement authentication with FIDO2 biometric security keys in cyberelements. The content of this